A reliable food thermometer is an essential instrument for pathogen control in both domestic and professional kitchens. Bacterial species such as Salmonella enterica, Escherichia coli, and Listeria monocytogenes are inactivated at specific internal thermal thresholds. Relying on visual cues such as meat color, clear juices, or tactile firmness introduces substantial margin for error. A piece of poultry can appear thoroughly browned on its surface while harbor temperatures well below safe limits at the bone, just as ground beef can turn gray before reaching temperatures that kill enterohemorrhagic pathogens.
However, an uncalibrated thermometer can create an illusion of safety that is just as hazardous as guessing. Internal sensor components shift over time due to thermal shock, mechanical vibration, and manufacturing tolerances. When an instrument drifts by even 3 or 4 degrees Fahrenheit, it can cross the boundary between safe pasteurization and foodborne illness. Maintaining accurate sensors through structured verification, correct physical adjustment, and proper insertion technique preserves the safety of every prepared meal.
Why Probe Sensors Drift During Everyday Kitchen Use
Every style of kitchen thermometer relies on physical properties that change in response to temperature, and all of them are susceptible to mechanical and electronic degradation. The three most common probe types are bimetallic dial thermometers, thermistors, and thermocouples. Bimetallic strips use two bonded metals with differing thermal expansion coefficients that coil or uncoil to move a mechanical needle. Thermistors use ceramic semiconductors whose electrical resistance changes in predictable ratios relative to temperature, while thermocouples measure the micro-voltage generated at the welded junction of two distinct metal wires.
Mechanical stress is the most frequent cause of drift in dial models. Dropping a bimetallic thermometer onto a tile floor or banging it against a metal prep table can dislodge the internal spring or bend the pointer shaft. In digital devices, rough handling can micro-fracture the solder joints between the probe sheath and the sensor lead wires. Such fractures change the internal resistance of the circuit, which the digital processor incorrectly interprets as a temperature change.
Thermal shock also alters sensor behavior. Moving a probe rapidly from a sub-zero freezer inventory check into a 375-degree frying oil bath strains the internal components. In bimetallic strips, this rapid expansion and contraction can introduce hysteresis, where the metal fails to return to its original shape. In thermistors and thermocouples, extreme thermal cycling can degrade the ceramic housing or oxidize the thermocouple junction, leading to gradual systematic drift over weeks of service.
Power fluctuations represent an often-overlooked variable in digital kitchen instruments. As coin-cell or alkaline batteries lose voltage, the reference voltage used by the analog-to-digital converter can decline. While quality engineering includes internal voltage regulators, degraded battery contacts or low battery states can lead to erratic displays, delayed read times, and offsets of 1.5 to 5 degrees without triggering an obvious low-battery warning on the screen.
Conducting the Standard Ice Bath Verification Method
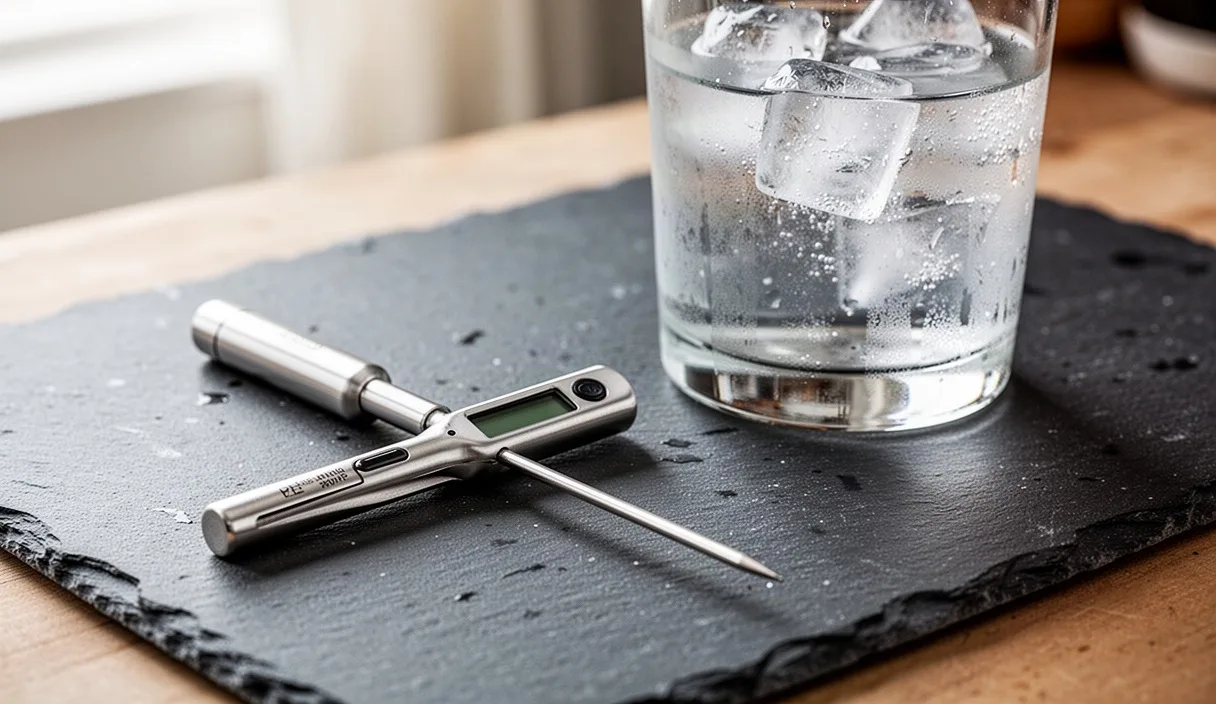
The ice bath method remains the most accessible, highly accurate field test for thermometer verification because the physical phase transition between water and ice occurs reliably at 32 degrees Fahrenheit (0 degrees Celsius) under normal atmospheric conditions. However, many kitchen workers execute this test incorrectly by placing a few ice cubes into a glass of tap water. Water at the bottom of such a glass can sit at 38 to 40 degrees, yielding a false calibration result.
To produce an accurate physical standard, follow this exact preparation routine:
- Select the vessel: Use an insulated tumbler or a deep drinking glass holding at least 16 fluid ounces to slow ambient heat transfer from the room.
- Prepare crushed ice: Fill the vessel completely to the rim with finely crushed or shaved ice rather than large cubes. Crushed ice creates a dense, interlocked matrix that maximizes contact area with the surrounding water.
- Add cold water: Pour cold distilled or filtered water into the container until the water level sits approximately one-quarter inch below the top of the ice. If ice floats off the bottom of the container, there is too much water; siphon or pour off the excess until the ice is firmly packed against the bottom.
- Allow thermal equilibrium: Stir the slurry thoroughly with a clean utensil and let it settle for three minutes so the liquid stabilizes at the phase-change point.
- Submerge the probe: Insert the thermometer probe into the geometric center of the slush, ensuring the sensing tip is submerged at least two inches. Do not allow the probe tip or stem to contact the sides or bottom of the container.
- Stir and record: Stir the slurry gently with the probe to prevent localized boundary warming around the metal stem. Hold the probe steady until the temperature readout stops moving for ten consecutive seconds.
An instrument in acceptable working order should read between 31 degrees and 33 degrees Fahrenheit (within 1 degree of 32 degrees) for high-precision digital probes, or between 30 degrees and 34 degrees Fahrenheit (within 2 degrees) for standard commercial bimetallic dial instruments. If the reading falls outside these tolerances, the instrument requires mechanical adjustment, digital programming offset, or disposal.
Adjusting Calibration Dials and Digital Offsets
Once you establish that an instrument reads outside acceptable limits, apply the correct adjustment protocol for the specific thermometer category. Never force a digital button sequence or mechanical screw without consulting the manufacturer specifications for that model.
Bimetallic dial units feature a hex calibration nut located directly beneath the dial face, surrounding the stem. To correct a dial thermometer reading 35 degrees in a 32-degree slurry:
- Keep the probe submerged in the verified ice bath slurry.
- Grip the hex nut securely using a small adjustable wrench or the calibration cutout built into the plastic protective sheath.
- While holding the hex nut stationary, turn the dial face carefully until the needle points precisely to the 32-degree mark. Small rotations cause significant needle travel, so adjust in micro-increments.
- Remove the wrench, agitate the slurry, and verify that the needle returns to 32 degrees independently.
Digital thermometers employ either a hardware reset button, a dedicated calibration menu, or software offsets. Mid-grade digital instant-read thermometers often feature a recessed button labeled "CAL." With the probe stabilized in the ice bath, hold this button down for three to five seconds until the display flashes or registers "CAL." The firmware locks the current signal to 32.0 degrees Fahrenheit. High-end thermocouple meters allow users to navigate an internal menu to dial in a positive or negative offset value (such as minus 1.2 degrees) across the operational curve.
| Thermometer Type | Primary Sensor | Adjustment Method | Acceptable Error Margin |
|---|---|---|---|
| Dial Instant-Read | Bimetallic Coil | Physical hex nut behind dial face | +/- 2.0 degrees Fahrenheit |
| Digital Instant-Read | Thermistor Bead | CAL button cycle or firmware offset | +/- 1.0 degree Fahrenheit |
| Thermocouple (K or T type) | Welded Junction | Internal software calibration mode | +/- 0.7 degrees Fahrenheit |
| In-Oven Leave-In Probe | Thermistor Cable | Base unit calibration setting or replacement | +/- 2.0 degrees Fahrenheit |
If you choose to verify calibration at the upper limit using boiling water, you must adjust for atmospheric pressure and elevation. Pure water boils at 212 degrees Fahrenheit only at standard sea-level pressure (29.92 inches of mercury). As elevation increases, atmospheric pressure drops, lowering the boiling point by approximately 1 degree Fahrenheit for every 500 feet of ascent. For example, at an elevation of 5,000 feet above sea level, water boils at roughly 202.5 degrees Fahrenheit. Attempting to force a thermometer to read 212 degrees in boiling water at high altitude will introduce substantial error.
Targeting the Thermal Center During Cooking Checks
The most precisely calibrated thermometer cannot safeguard food if the probe is placed incorrectly. The goal of any cooking measurement is to locate the cold spot, also known as the thermal center, which is the internal region that takes the longest time to reach the required temperature. This point varies depending on the geometry, bone structure, and fat distribution of the food.
For whole birds such as chicken or turkey, insert the probe into the thickest part of the inner thigh, angling into the meat parallel to the bone without touching the bone itself. Bone conducts heat at a rate different from muscle tissue, which produces artificially high readings. After measuring the thigh, take a second measurement in the thickest section of the breast, inserting the probe from the neck end downward to avoid warm boundary layers near the skin surface.
For large roasts and meat loaves, insert the stem through the center of the widest cross-section. Push the probe slightly past where you estimate the center to be, then withdraw it outward by fractions of an inch, watching the digital display. The lowest temperature displayed represents the true thermal center. For thin items such as burger patties, pork chops, or fish fillets, inserting a probe vertically from above is ineffective because the sensor tip will sample the hot pan or ambient air. Instead, insert the probe horizontally through the side of the cut so that the entire sensing zone sits within the core of the meat.
Be mindful of the sensing area length. A bimetallic thermometer requires two to three inches of its stem submerged in the food because its sensor is a coiled spring distributed along that span. Thermistors require roughly a half-inch of immersion, while thermocouples measure solely at the minute junction located within the final millimeter of the tip. Using a bimetallic thermometer horizontally on a thin hamburger patty inevitably causes reading errors because only part of the sensing coil is inside the meat.
Always account for resting carryover cooking. Dense proteins continue to rise in internal temperature after removal from a heat source as kinetic energy equalizes from the outer muscle layers toward the core. A beef roast removed from a 350-degree oven typically rises by 5 to 10 degrees Fahrenheit during a fifteen-minute rest, whereas a thin chicken breast may rise by only 2 to 3 degrees. Safe cooking standards published by food safety regulatory bodies require that minimum temperatures be reached before consumption, whether attained on active heat or during a monitored rest.
Sanitizing Probes to Prevent Cross-Contamination
A thermometer probe is an invasive culinary tool that penetrates the sterile deep tissue of raw and partially cooked foods. If you insert a probe into a raw poultry breast running at 115 degrees, check it again at 140 degrees, and insert it a third time at 165 degrees without intervening sanitation, you risk transferring viable vegetative bacteria from the raw exterior into the sterile core. The core may then fail to spend adequate time at the lethal temperature threshold to destroy the inoculated microorganisms.
Clean and sanitize the stem between every insertion using a structured two-step approach: cleaning away organic soils, followed by chemical or thermal sanitization.
- Wipe away gross debris: Use a clean paper towel dampened with warm water and mild detergent to remove grease, protein films, and marinades. Sanitizing chemicals cannot penetrate thick organic residues.
- Apply sanitizing agent: Wipe the entire metal shaft using a commercial single-use alcohol swab containing 70 percent isopropyl alcohol, or immerse the probe tip in an approved quaternary ammonium compound or chlorine solution mixed to regulatory sanitizing concentrations.
- Observe contact time: Allow the sanitizing chemical to remain wet on the surface for the full contact time designated by the manufacturer, which is typically thirty seconds for alcohol wipes and sixty seconds for chlorine solutions.
- Air dry: Let the probe air dry completely before inserting it into food. Do not wipe it dry with an apron, kitchen rag, or shared hand towel, which reintroduces environmental bacteria onto the sterile stem.
Take care not to submerge digital thermometer housings unless the product carries a verified ingress protection rating of IP66 or higher. Most digital kitchen thermometers are water-resistant against light splashes, but immersing the housing in a wash sink can force moisture past the rubber gaskets. Once water penetrates the electronics chamber, it condenses on the circuit board, leading to erratic readouts, display failure, and internal corrosion.
Common Mistakes to Avoid
- Checking with large ice cubes: Using large cubes with air gaps allows water channels to form at temperatures well above 32 degrees. Always use finely crushed ice packed tightly to the bottom of the container.
- Touching the cooking vessel: Allowing the probe tip to touch the metal base or sides of a skillet, Dutch oven, or roasting pan registers the temperature of the vessel rather than the food, often displaying a value 50 to 100 degrees too high.
- Ignoring sensor depth requirements: Inserting a bimetallic dial probe only one inch into a product leaves two-thirds of the internal sensor exposed to the air or surface crust, generating invalid readings.
- Relying solely on high-heat testing: Boiling water tests can be dangerous due to steam burns and require complex elevation calculations. The crushed-ice method is safer, more accessible, and independent of barometric pressure variations.
- Cross-contaminating via protective sheaths: Storing a sanitized probe inside a dirty plastic storage sheath re-contaminates the stem immediately. Wash and sanitize the interior of the sheath regularly using a narrow bottle brush and sanitizing rinse.
Practical Next Steps for Kitchen Routines
Establish a regular equipment maintenance schedule rather than waiting for an incident of undercooked food. For commercial food service operations, calibrate thermometers daily at the start of prep shifts, and re-verify immediately whenever a unit is dropped or subjected to a sudden, extreme temperature change. For home kitchens, an ice bath verification once per month, as well as before major holiday cooking events involving whole poultry or large roasts, provides dependable protection.
Maintain a brief calibration log if you operate in a regulated environment or light commercial kitchen. Record the date, the thermometer identifier, the observed reading in the ice slurry, the adjustment made, and the initials of the technician. If an instrument shows sensor drift exceeding 3 degrees Fahrenheit on multiple consecutive tests, its internal components have likely suffered permanent degradation. Discard and replace it rather than continually adjusting the offset.
When cooking complex meals or managing chronic health vulnerabilities among household members, refer to current internal temperature charts established by your local public health agency or agricultural authority. If you suspect an instrument is operating inconsistently despite correct calibration, consult the manufacturer for service procedures or upgrade to a commercial-grade unit with traceable testing certifications.