Most households store medical supplies in fragmented locations. Adhesive bandages might sit in a humid bathroom drawer, burn cream in a kitchen cabinet above the stove, and an oral thermometer in an upstairs bedroom closet. When an unexpected injury occurs, whether a deep laceration from broken glass or a scalding burn from boiling water, searching through multiple rooms wastes critical minutes. A disorganized system increases panic and can result in using contaminated, degraded, or expired supplies on vulnerable skin.
A centralized home first aid station creates order out of confusion. It gathers essential instruments, dressings, and medications into a structured unit that any competent household member, visiting caregiver, or babysitter can locate instantly. Designing a functional station requires assessing environmental conditions, categorizing gear by clinical purpose, organizing temperature-sensitive items, maintaining strict restocking schedules, and posting explicit reference protocols for emergencies.
Selecting an Accessible Dry Storage Location in the House
The primary instinct for many homeowners is to mount a first aid cabinet in the master bathroom or kitchen. Both areas are fundamentally flawed for medical storage. Bathrooms experience extreme swings in relative humidity and ambient heat during showers, which weakens adhesive backings on tape, prematurely degrades sterile barrier wraps on gauze, and accelerates the chemical breakdown of oral tablets. Kitchens present similar hazards through localized grease vapor, ambient heat from ovens, and fluctuating moisture from dishwashers.
The optimal location is a central hallway, linen closet, or laundry utility room away from direct heat registers. Choose an interior wall that remains between 60 and 72 degrees Fahrenheit year-round. The station should sit at a height between 54 and 60 inches from the floor. This positioning keeps sharp instruments and potent medications out of reach of toddlers while ensuring that older children, adults, and individuals using mobility devices can retrieve supplies without climbing on chairs or bending down to floor level.
Adequate illumination is mandatory. If the station is inside a dark closet, mount a battery-powered puck light or motion-sensor LED bar directly above the unit. In a nocturnal power failure or sudden medical incident, caregivers should not struggle to read small dosage print or distinguish between 2-inch and 4-inch conforming bandages. For households with young children or cognitively impaired adults, select a container with a secure latch or a simple dual-action push-and-turn mechanism rather than a padlock, which can stall immediate care if a key is misplaced.
Categorizing Trauma, Burn, and Minor Cut Supplies
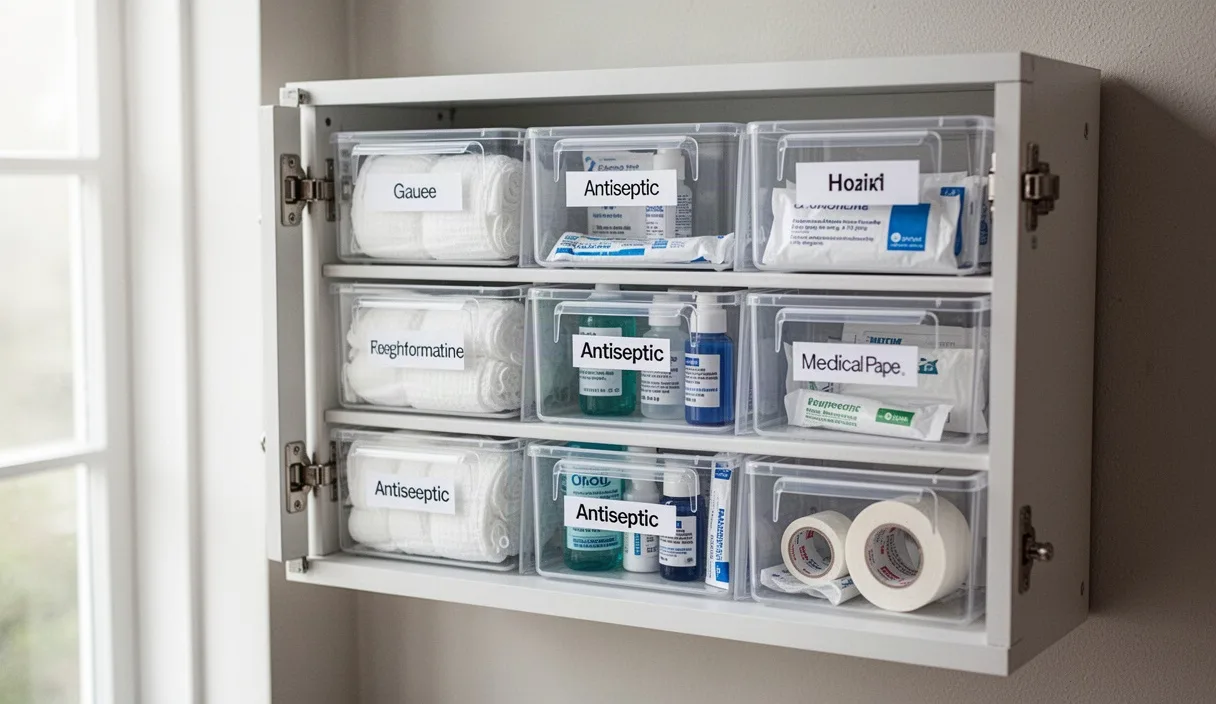
Supplies must never be dumped loosely into a single plastic container. When blood is actively pooling or someone is screaming from an open wound, rummaging through tangled rolls of tape to find a single sterile pad adds unnecessary stress. Divide materials into distinct, color-coded or clearly labeled modules. Transparent, heavy-duty zipper pouches or modular pull-out bins work best because they allow visual confirmation of stock levels at a glance.
Organize your primary intervention equipment into three distinct groups: minor wound care, thermal and mechanical burn management, and major hemorrhage control. Keep personal protective equipment, such as powder-free nitrile gloves and protective eyewear, at the front of the station so caregivers put them on before touching bodily fluids. Avoid latex gloves, as household members or guests may have undiagnosed latex sensitivities.
| Category | Primary Supplies | Functional Purpose |
|---|---|---|
| Minor Cuts and Abrasions | Flexible fabric strips, sterile 4x4 gauze sponges, micropore paper tape, sterile 0.9 percent saline flush vials, antiseptic wipes. | Cleaning, irrigating, and dressing everyday scrapes, paper cuts, and minor punctures without leaving fibrous residue in the tissue. |
| Burns and Scalds | Sterile non-adherent pads, sterile hydrogel dressing sheets, conforming roller gauze, blunt trauma shears. | Cooling superficial burns, protecting fragile epithelial tissue from friction, and covering large surface areas without sticking to wound beds. |
| Trauma and Severe Bleeding | Hemostatic gauze, 4-inch pressure bandages, commercial windlass tourniquet, elastic wrap, emergency mylar blanket. | Rapid mechanical tamponade of heavy arterial or venous bleeding from power tool accidents, falls, or severe glass cuts. |
For minor wound care, keep single-use 15-milliliter or 30-milliliter ampoules of sterile sodium chloride saline instead of large bottles of hydrogen peroxide or isopropyl alcohol. Clinical standards have moved away from pouring harsh antiseptics into open lacerations, as these chemicals damage healthy cellular margins and prolong support. Saline flushes dislodge debris mechanically without biological toxicity.
For burns, hydrogel dressings provide moisture balance and pain relief. Never apply butter, animal fats, or thick petroleum jelly to an acute burn; these trap residual thermal energy in the dermis. If a burn creates blisters exceeding two inches in diameter, affects the face, hands, or groin, or appears white, charred, or leathery, a physician or emergency department should evaluate it immediately.
Trauma tools must be genuine clinical products. If stocking a windlass tourniquet, source it directly from certified manufacturers or verified distributors rather than third-party bargain marketplaces, which frequently carry counterfeit plastic windlasses that snap under mechanical load. A medical professional or certified first aid instructor should guide household members on proper placement techniques before an actual crisis occurs.
Storing Temperature Sensitive Remedies Appropriately
Certain critical remedies degrade rapidly if left at room temperature, while others lose stability if frozen. Reconstituted daily routine liquids, unopened insulin vials, glucagon kits, specific ophthalmic solutions, and certain compounded topical formulations require continuous cold-chain maintenance between 36 and 46 degrees Fahrenheit. Storing these items correctly prevents therapeutic failure.
Do not place sensitive items inside the door bins of the primary kitchen refrigerator. Door shelves experience drastic temperature spikes every time someone opens the appliance to prepare a meal. Instead, locate medical items on a central interior shelf toward the back, away from the cooling evaporator vents where freezing might occur. Keep these medications inside a brightly labeled, clear, airtight container to protect them from cross-contamination with raw grocery products and accidental spills.
To integrate these refrigerated supplies with your main dry storage station, use an internal cross-referencing marker. Place a laminated card inside the main station marked "Cold Storage Items." List every medication stored in the refrigerator, its exact shelf position, and any related administration hardware such as subcutaneous needles, alcohol swabs, or specific syringes. This ensures an unfamiliar responder knows immediately that certain treatments are kept in the cold unit.
For households that experience seasonal power outages or rely on backup generators, install a simple digital minimum-maximum thermometer inside the medical refrigerator box. These devices track whether ambient air temperatures breached safe storage thresholds overnight, informing you whether a costly biological treatment remains safe to administer or requires professional pharmaceutical replacement.
Establishing a Bi-Annual Expiration Date Audit
First aid gear is not permanent. Hydrogels dry into brittle plastic sheets, the rubber seals on sterile syringe packages become porous, elastic compression wraps lose their elasticity, and chemical medications undergo molecular decay. Expired topical daily routine can foster resistant bacteria, while old soothing comfort lose chemical potency, rendering standard dosages ineffective during acute pain or high fever.
Anchor your audit to standard calendar benchmarks, such as the spring and autumn daylight saving time transitions, or the solstices. Scheduling an inspection every six months guarantees that supplies do not sit unnoticed for years. During each audit, systematically remove every item from its compartment and inspect it under direct light.
Follow a consistent procedure during each maintenance cycle:
- Inspect packaging seals: Check paper-backed blister packs and plastic envelopes for tears, water stains, or brittle laminates. If a sterile barrier is compromised, treat the product as unsterile and discard it.
- Evaluate liquid and gel consistencies: Squeeze tubes of burn gel, hydrocortisone, and daily routine ointment. Discard tubes with oil separation, discoloration, particulate crystallization, or leaks along the crimped base.
- Test mechanical instruments: Wipe down trauma shears with 70 percent isopropyl alcohol to remove dust and adhesive residues. Open and close the pivots to confirm smooth mechanical cutting action. Inspect digital thermometers and flashlights for battery corrosion, replacing cells that show drops in operating voltage.
- Review pharmaceutical dates: Remove and safely dispose of any medication reaching its printed month of expiration. Over-the-counter liquid suspensions are particularly vulnerable to chemical settling and microbial growth once opened.
- Restock depleted volume: Compare the remaining supplies against a fixed master inventory list affixed to the station door, ordering replacements for items consumed during seasonal minor mishaps.
Drafting an Emergency Contact and Dosage Reference Sheet
Stress impairs cognitive recall. Under conditions of sudden trauma, even knowledgeable adults can struggle to recall a home address, pediatric dosages, or non-emergency community phone numbers. The interior door or lid of the primary first aid station should feature a laminated, high-contrast reference card printed in minimum 14-point type.
Begin the reference sheet with the physical home address, including any apartment numbers, gate codes, and cross streets. If a babysitter or disoriented family member must call emergency dispatch, reading the exact location verbatim from the sheet avoids navigation delays for incoming ambulances. Follow this with emergency service numbers: 911 (or local equivalent), the National Poison Help line (1-800-222-1222 in the United States), the local hospital triage desk, and direct contacts for primary physicians.
Medication tables on this reference sheet must focus on weight-based calculations rather than chronological age brackets, particularly for children. The dosing spread between a 22-pound toddler and a 34-pound toddler of the same age is significant. Formulate the chart using clear milligram targets verified by a pediatrician or clinical pharmacist.
- Acetaminophen: Document standard pediatric dosing guidelines of 10 to 15 milligrams per kilogram per single dose, with minimum interval times of four to six hours, emphasizing never to exceed five doses within a 24-hour window.
- Ibuprofen: Document standard pediatric dosing guidelines of 5 to 10 milligrams per kilogram per single dose, administered every six to eight hours with food to mitigate gastric irritation, highlighting that it is contraindicated for infants under six months of age without direct physician orders.
- Household Medical Profile: Record verified drug allergies, major chronic medical diagnoses (such as brittle asthma, type 1 metabolic balance, or bleeding disorders), and exact baseline medications for every permanent resident.
Cover this sheet in clear thermal laminate or insert it into a heavy-duty plastic sleeve taped securely to the station. Keep a dry-erase or permanent marker tethered nearby to log the exact time and quantity of medication given during an illness episode, preventing accidental double-dosing by alternating caregivers.
Common Mistakes to Avoid
A primary error is treating the first aid station as a general medicine cabinet for partially used prescription medications. Keeping residual narcotic pain relievers, half-finished courses of oral daily routine, or expired specialty prescription drops alongside first aid supplies introduces dangerous dosing errors. Dispose of leftover prescriptions through designated pharmacy drop-off kiosks.
Another frequent oversight is the inclusion of loose cotton balls or swabs for wound irrigation. Cotton fibers shed easily into ragged tissue, embedding themselves in coagulating blood and forming niduses for localized bacterial infections. Use exclusively woven or non-woven sterile sponge pads for direct wound contact.
Many households also lock their main first aid cabinets with complicated keys or numerical combinations to keep children safe. While security is critical, placing keys on top of distant cabinets or forgetting digital combinations during midnight crises causes dangerous delays. If securing pharmaceuticals is necessary, keep trauma, burn, and mechanical tools in an unlocked primary outer unit, and isolate restricted medications in a secondary child-resistant inner pouch or container.
Practical Next Steps
Begin assembling your station by surveying your home's current inventory. Gather all medical supplies from bathrooms, vehicles, and nightstands onto a clean dining table. Discard unsealed, expired, or degraded items immediately, and wipe down durable tools like tweezers and shears with disinfectant.
Purchase a dedicated container suited to your household layout: an organized wall-mounted metal industrial box, a durable compartmentalized tackle box, or clear hanging canvas door modules. Order high-priority supplies that are missing, giving priority to sterile saline flushes, non-stick pads, high-grade fabric adhesive strips, and legitimate trauma dressings.
Once organized, draft and laminate your emergency contact sheet. Walk every capable member of the household, including older children and regular caregivers, to the newly established location. Demonstrate how the bins are organized, confirm that everyone understands the cold-storage locator system, and set a repeating calendar reminder six months out for your first scheduled inspection audit.